Keep Updated on Gas Appliance Recalls
Consumers should maintain awareness of current gas appliance recalls and safety alerts to prevent injuries. Check recall lists regularly to protect your home and family.
Read MoreUnsure how to install your new gas cooktop? Our guide covers pre-install checks, sizing the opening, securing the unit, connecting gas and power safely. Follow our step-by-step process to properly set up your new gas cooktop.

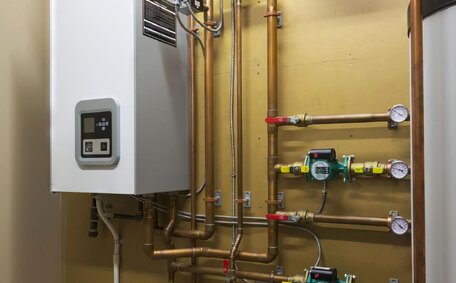
It’s essential to understand the specific gas and electrical requirements for your gas stove installation to ensure new cooktops are installed correctly and operate safely, complying with all relevant standards.
For most gas stoves, you’ll require a dedicated 15-ampere electrical circuit with a grounded outlet designed to fit existing power requirements, powering the cooktop’s spark igniters and electrical components. A standard 20-mm gas pipe, which is typically required for gas stoves, is crucial for maintaining a consistent gas flow to the burners.
Using undersized electrical wiring or inadequate gas port designs can lead to poor performance or hazardous situations. It’s wise to consult building codes and hire a qualified gas fitter for gas line and electrical work during cooktop installation.
When choosing from various gas ranges, it’s pivotal to take into account the size and specifications to make sure they effortlessly integrate into your existing kitchen layout. Cooktop sizes vary from 76 to 91 cm in width, with some models up to 86 cm square, catering to different kitchen layouts and including gas-electric hybrid stoves.
Select a size designed to optimise your space and line accommodate within your countertop cut-outs and cabinetry, while also giving you enough room to manoeuvre pots and pans. Consider extras like a chef gas wok burner or grill element if your space allows. Choose a gas cooktop that matches your kitchen’s style and the material of your work surfaces.
Allowing ample room around the cooktop prevents accidental burns and allows for safely handling hot cookware. Carefully measuring to find the ideal size and style cooktop for your kitchen is well worth the effort.
While replacing an old one, such as a gas cooker, you must meticulously plan out the appropriate clearances to combustible surfaces like cabinets, walls, and floors around the appliance. Cooktop clearance usually must be more than 76 cm from the appliance to any unprotected overhead area, although this varies with different models.
Ensuring there are adequate distances between your appliances and combustibles will make sure potential fire hazards are minimised and heat and fumes can vent effectively. Surfaces within 76 cm above the cooktop need a stainless steel guard extending at least 15 cm past the oven’s edge.
Ensure efficient use of kitchen space by maintaining at least 60cm of clearance between the cooktop’s front edge and any vertical flammable materials. Planning your layout to optimise the space around base cabinets ahead of time ensures you meet all clearance requirements for safe operation.
Before installation, accurately measure to confirm that your new appliance will fit perfectly in your existing cooktop’s space. Measure the existing cutout’s width, depth, and corners accurately to ensure your old gas cooktop can be replaced without difficulty.
Cut out the new opening meticulously according to your cooktop’s specifications for a precise fit. Always use due diligence and learn when to seek professional help for alterations to your cooktop, as mistakes can prove costly.
Ensure a minimum clearance of 76 to 91 cm above to combustibles, and adequate space around the cooktop for safe and convenient use. Confirm accurate measurements to avoid any fit or finish issues when installing your new gas cooktop.
Follow the manufacturer’s instructions diligently to securely install your gas stove in the countertop opening. You’ll need to establish a secure gas connection and connect the electrical lines ensuring a secure, leak-proof fit for all involved gas appliances.
Start by confirming you have the minimum clearances of 30 inches to combustibles above and ample room all around for ventilation and ease of use. Align the cooktop’s gas connection and angle pipe lines through the cutout before placing it into the niche.
Use pipe joint compound or yellow Teflon tape on the end fitting to create a secure and leak-proof connection between the cooktop’s gas regulator and your gas supply line. Attach the end fittings with precision, then meticulously check each gas connection point for leaks to ensure the cooktop’s safety. Ensure a snug fit between the cooktop’s gas port and the right angle pipe to maintain a seamless gas supply.
Secure the cooktop into the cutout using the provided mounting brackets or screws to maintain your kitchen’s elegant look. Confirm adequate ventilation around sides and that all clearances meet manufacturer specs.
Consider hiring a fully licensed technician if you’re uncertain about installing new appliance securely and getting it ready for use. Following strict safety protocols ensures the cooktop in your newly sold home will function reliably for years to come.
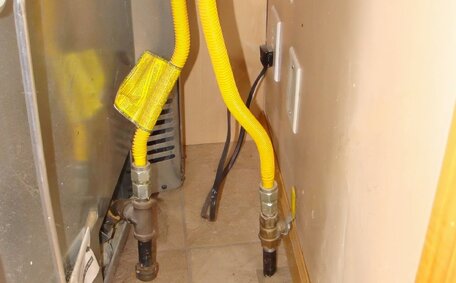
Position a gas cock within 1 metre of your new cooktop to act as a readily accessible shutoff mechanism when connecting the gas supply. This allows you to easily turn the gas off when needed for safety or maintenance.
Use a 20-mm black gas pipe with gas cock fittings when disconnecting or connecting your existing gas lines to the shutoff valve. Employ Teflon pipejoint tape or utilise pipe joint compound to create a gas-tight seal and prevent any leaks. Connect the gas line to the regulator inlet with the proper end connector fitting for your cooktop model.
Ensure to check your connections meticulously for leaks using a detector before turning the gas back on; you can use professional services if you’re uncertain. Hire a licenced professional if you have any concerns installing gas lines or connections yourself.
Testing for gas leaks is a crucial final step in the gas stove installation process. This ensures all connections, including the line shutoff valve, are secure, leak-proof and operating safely before regular stove installation use.
Begin by opening the shutoff valve to initiate gas flow to the cooktop. Apply a 50/50 solution of dish soap and water to all connections and fittings using a spray bottle or brush. Check the regulator, valves, unions, joints, and tubing.
If any bubbles form along the cooktop’s fitting line, this indicates a gas leak. Tighten joints or replace fittings as needed to stop leaks before testing again. Feel free to hire a professional if you cannot resolve leaks.
Sniff near the floor for the distinct sulphur smell that may indicate insecure gas connections. If detected, turn off the gas supply and call your local gas company or professional service. Never use an open flame device to check for leaks.
For enhanced safety, consider acquiring an electronic gas leak detector. This more reliably detects smaller, hard to find leaks. Always test after performing any gas connections or cooktop maintenance.
Verifying a gas-tight, leak-free cooktop before use ensures appliance longevity plus household safety. Never operate a cooktop without properly testing first or repeatedly over time.
Consumers should maintain awareness of current gas appliance recalls and safety alerts to prevent injuries. Check recall lists regularly to protect your home and family.
Read MoreHard water leaves mineral deposits in hot water heaters and systems, causing corrosion and limescale buildup. This reduces efficiency and leads to higher energy bills and repair costs over time. Installing a water softener protects hot water appliances by removing the minerals that cause scale.
Read MoreYes, pipes can be relined more than once if they become damaged again. Our pipe relining service uses epoxy resin to coat the inside of your existing pipes, repairing cracks and damage for over 50 years. As experts, we’ll have your pipes relined in just one day with no digging required.
Read MoreWerrington, 2747 NSW
We will call back as soon as possible.